Thank you for choosing Angora Networks products.
This document describes the procedure for initial connection and configuration to the Verge switches. If you encounter any problems, please add your comments below, open a case from My Angora , or contact with your local Angora partner.
Before you start
Before you start powering up the device, check that the electrical connections is by the book.
The device can be connected to a standard cabinet with required connectors coming out of the box. Please make sure that the device is installed properly. If you are not going to install the device outside a cabinet, activate it on a stationary table without anything on it.
Accessing the CLI via the console port
You can access the device from the command line by connecting it with a Rj-45 / DB9 or Rj-45 / USB UART cable through the port marked ‘KONSOL’ on the left side of the Ethernet ports. This cable does not come out of the box. You can use other console cables that manage any other network devices, or order it directly from Angora Networks.
The out of band management found on the right side of SFP+ interfaces and marked as ‘YONETIM’ is not active yet. This port is used for diagnostic purposes only.
To receive data over the connection, you must use a terminal emulation program on your computer. You can use one of the popular applications like Putty, SecureCRT or Zoc7 to enable data communication.
Connecting the Rj-45 Console Port Connect
- Plug the Rj-45 end of the Rj-45 / DB9 (USB) cable to the ‘KONSOL’ port of the switch.
- If the other end of the cable has a DB9 connector, connect it to the serial port on the PC, or if it has a USB connector, to a USB port on the PC.
- Find the port number corresponding to the communication port on the PC (COMX)
- Start the terminal emulation program.
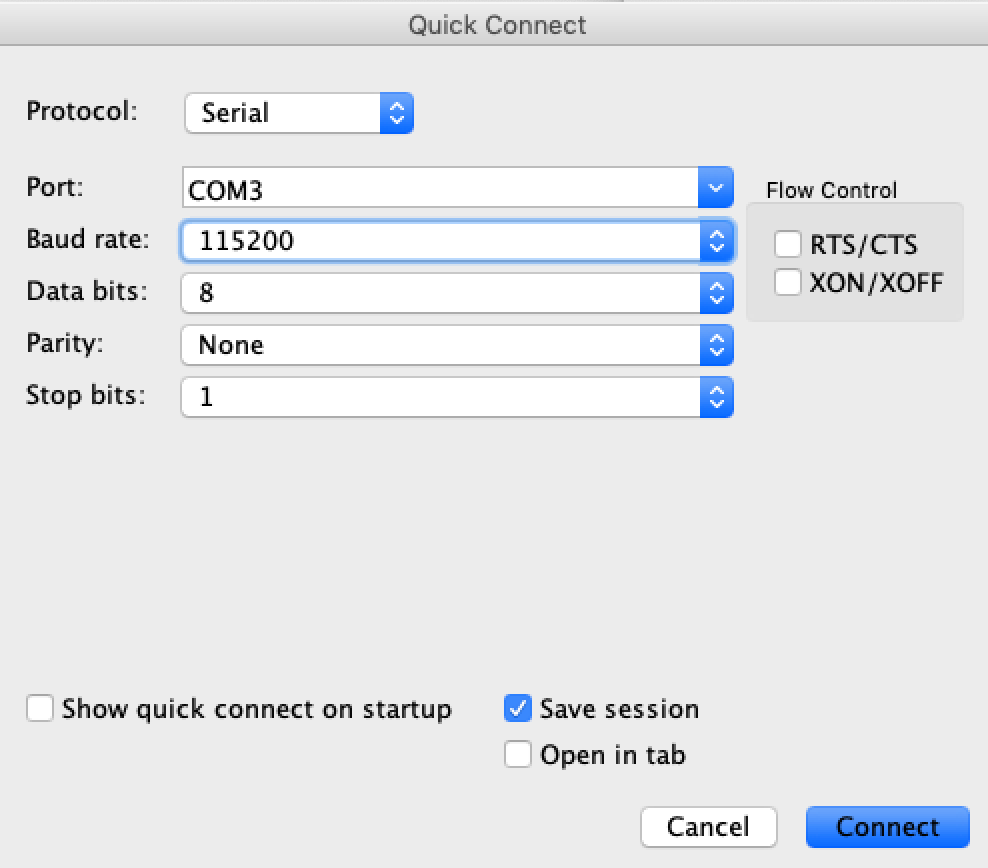
- Use the following parameters for the connection:
Protocol: Serial
Connection Port: COMX
Baud Rate: 115200
Data Bits: 8
Parity: None
StopBits: 1
Flow Control: None
Below is a screenshot of a connection made with SecureCRT application:
- Power up the device, and wait for connection is established, and boot logs to show up. It will take a few minutes to power on. When the start-up procedure is finished, the device will ask for the user name and password.
- For new devices, ‘admin’ should be used as the user name and password.
- Once the correct user name and password have been entered, the switch will enter into the command line to manage the device.
User Name: admin
Password: *******
switch #
If you are using Putty as the terminal emulator tool, please make sure that the backspace is emulated via
Ctrl+H from the Session Options->Keyboard menu.
Leave A Comment?